

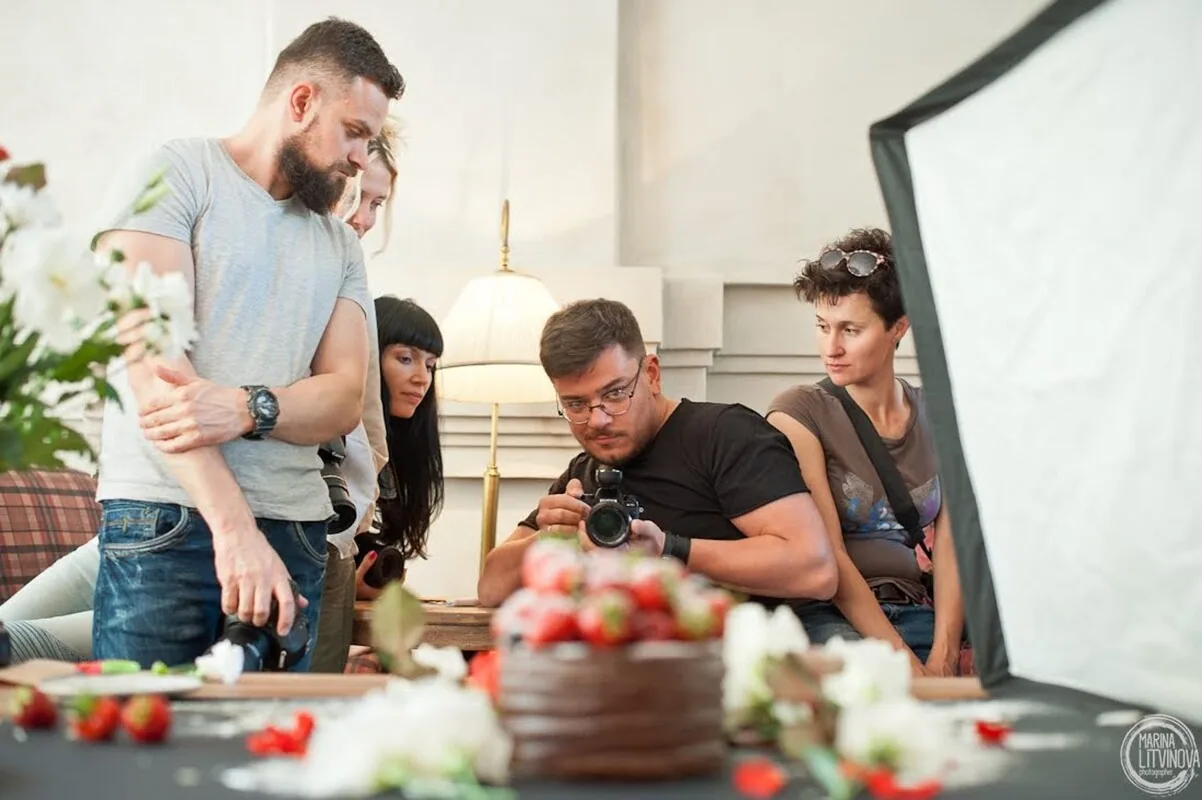
Take two photos of the same cup, shot half a minute apart. Same phone, same window, same light, same cup. One you want to keep and show people, the other you delete right away. The difference is almost always composition, and it’s exactly what beginners put off for later.
Learning exposure and everything your camera can do takes about three months. Learning to work with light takes around a year and a half. Composition is something a photographer studies for life, and that’s the most honest thing I can say about my profession after twenty years of commercial shoots.
Below we’ll go through the rule of thirds step by step, turn on the grid in your phone camera, and look at three grids that work better than the standard one: the golden ratio, diagonals with triangles, and the Fibonacci spiral. At the end there’s a ten-minute exercise, and after it you’ll see the difference in your own photos, not in someone else’s examples.
- What the rule of thirds is and why it works
- How to turn on the grid in your phone camera
- One grid for everything: why that’s not enough
- Three grids to start with
- Golden ratio vs. rule of thirds: the difference in practice
- A ten-minute exercise
- When it’s better to break the rule of thirds
- Mistakes that keep composition from showing up
- What to do today
What the rule of thirds is and why it works
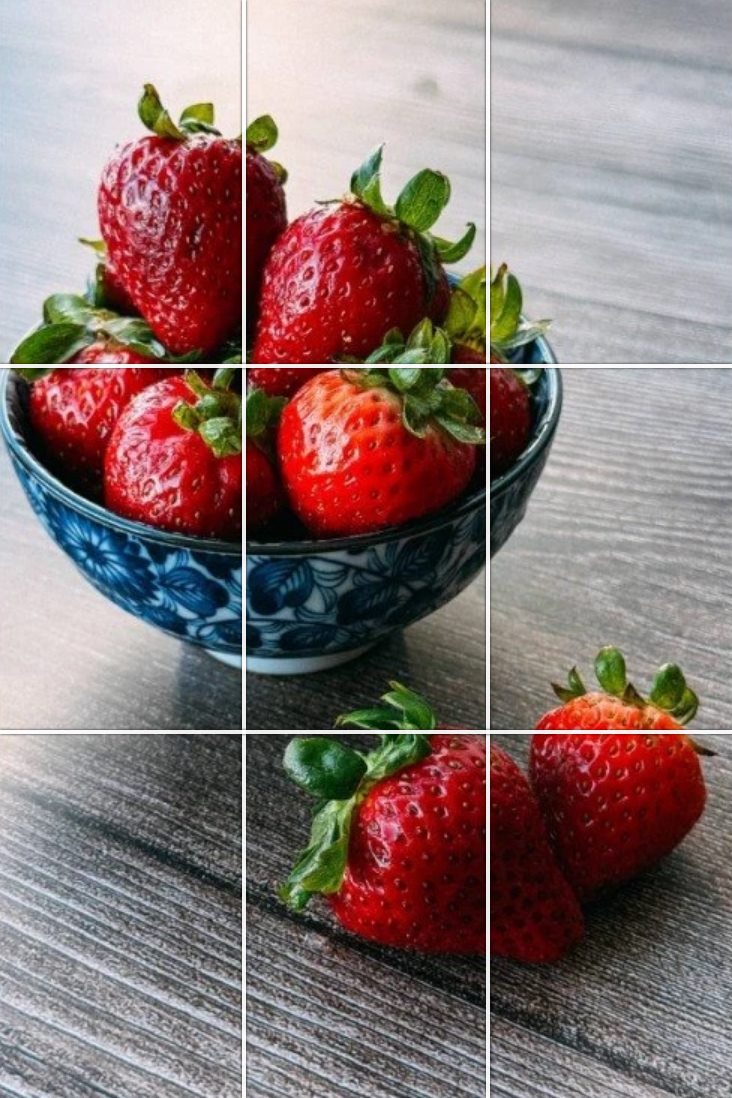
Imagine the frame ruled into nine identical rectangles by two vertical and two horizontal lines. The rule of thirds says one simple thing: place the main subject on a line or at a point where the lines cross, not in the geometric center. The four intersection points are called visual centers, because that’s where the eye lingers and where it starts reading the photo.
The reason is about balance, not taste. A subject dead center balances the frame completely, so the photo turns calm and static. As soon as you shift the subject to one side, the balance breaks, one part of the frame gets heavier, and the composition gains movement. That weight then needs something to catch it on the opposite side, and that’s what the other half of the frame is for.
Two habits grow out of the same rule, and they’re worth building right away. Put the horizon on the upper or lower horizontal grid line, depending on what’s more interesting: the sky or the foreground. Leave open space in front of a person or object, not behind them, because space behind the back reads as a dead end.
How to turn on the grid in your phone camera
The camera grid adds nothing to the file itself. It only draws lines on the screen while you shoot. It’s the fastest free change you can make to your photography right now.
Open “Settings,” then “Camera,” then the “Grid” switch. The lines show up in the camera right away, and you never need to turn them off again.
Open the camera, go to its settings through the gear icon and find “Grid.” Most models offer a 3×3 option, and that’s the one you want.
Point the camera at anything nearby and see where the lines land. The goal is simple: see the grid before you press the button, not remember it that evening.
Menu names vary a little between models, so look for the word “grid” in the camera settings. Some phones also have a level right next to it. Turn that on too.
You can crop a finished photo, and sometimes that really does save the day. The problem is that cropping removes what’s extra, but you can’t add breathing room you didn’t capture. Some resolution goes with the edges too, so for print or for a client that photo is weaker.
One grid for everything: why that’s not enough
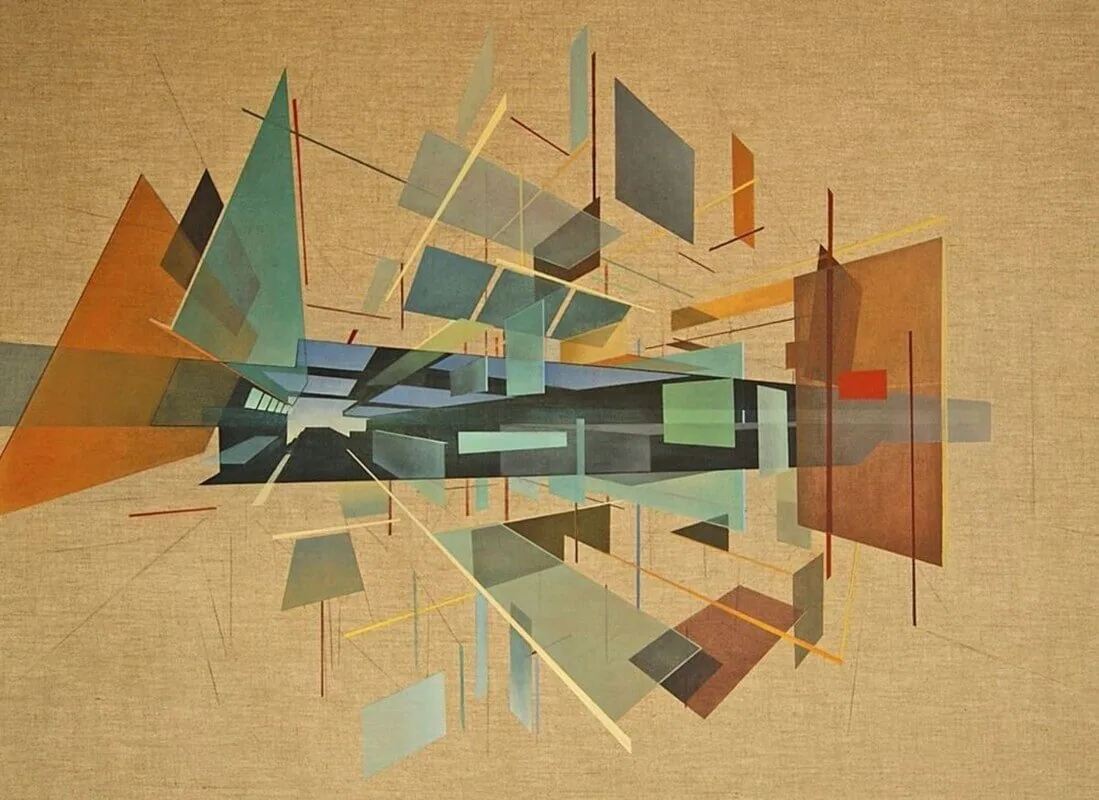
Your phone has one standard grid, and it’s the same for a plate on a table, a portrait, an interior and a shot in motion. It’s a lot like a kitchen with a single knife: you can cut everything with it, but the bread gets squashed, the fish tears, and the vegetables come out uneven. The jobs are different, and they need different lines too.
The other side of the same problem is formats. The thirds of a vertical frame for Stories run nowhere near the thirds of a horizontal one, and the square and the 4:5 feed format give you two more sets of points. With only one grid, you recalculate it in your head for every new format, and on a shoot there’s no time for that.
What sets a professional shoot apart is that the subject is never placed at random. Before I press the button, I already know where the eye of the person looking at this photo will go. The difference between a hundred-dollar photo and a three-hundred-dollar photo in the same niche usually comes down to this, not the camera. I wrote about gear in detail separately, in which camera to choose as a beginner, and the conclusion there is about the same.
Three grids to start with
Here are the three grids I show first. They cover most of what a beginner shoots, and they’re easy to read on a phone screen.
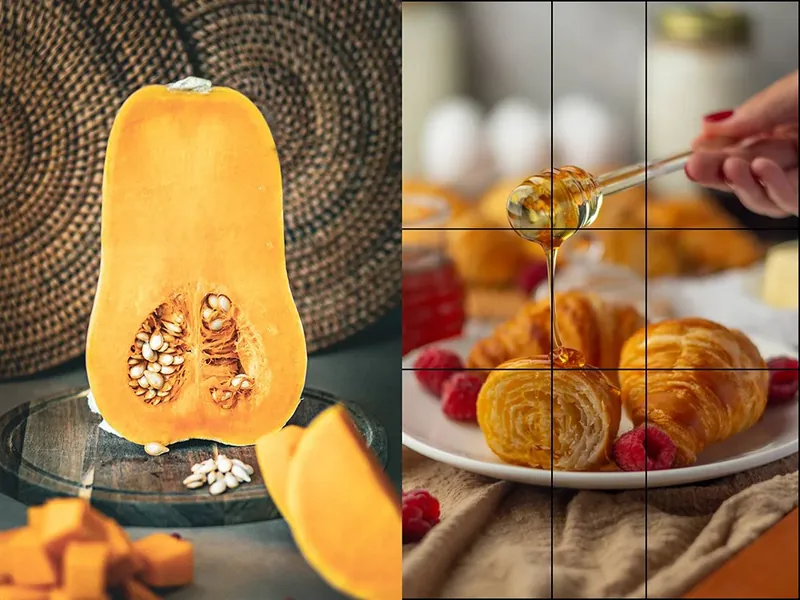
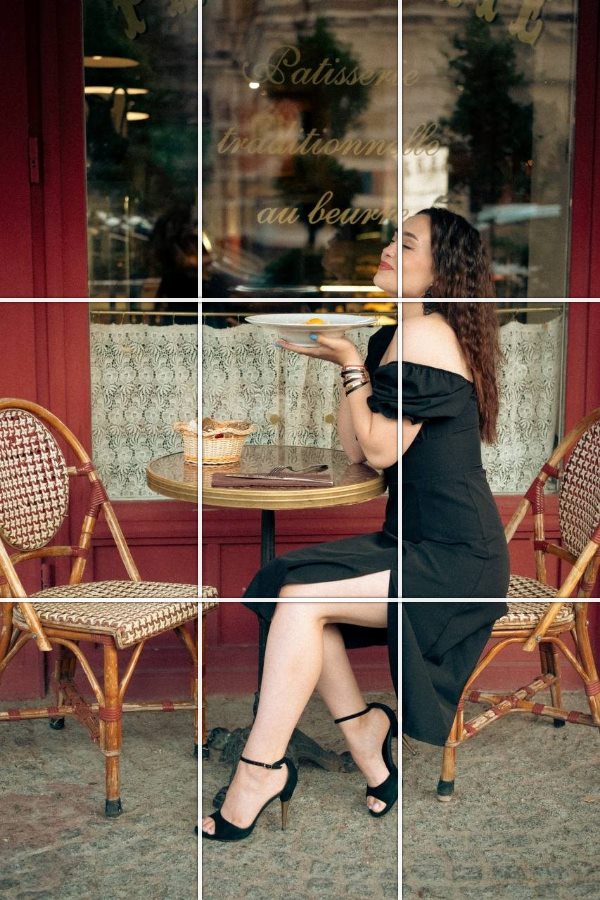
Golden ratio
What it is. The lines run not at a third of the frame but at 3/8 and 5/8 from the edge of each side. In percentages that’s about 37.5 instead of 33, so the intersection points sit closer to the center. The rule came from math and architecture long before photography: a whole is divided into two unequal parts so that the smaller relates to the larger as the larger relates to the whole.
When to use it. Still life, food on a table, product shots, a calm portrait, an interior. Basically any shot that needs harmony without pushing the subject hard toward the edge.
What changes. The main subject sits a little closer to the center than on thirds, and the frame stops falling apart into two halves. For food and product shots, a difference of a few percent of the width turns out to be decisive, because the plate stops escaping the frame.
 Viktoriia Kolesnyk
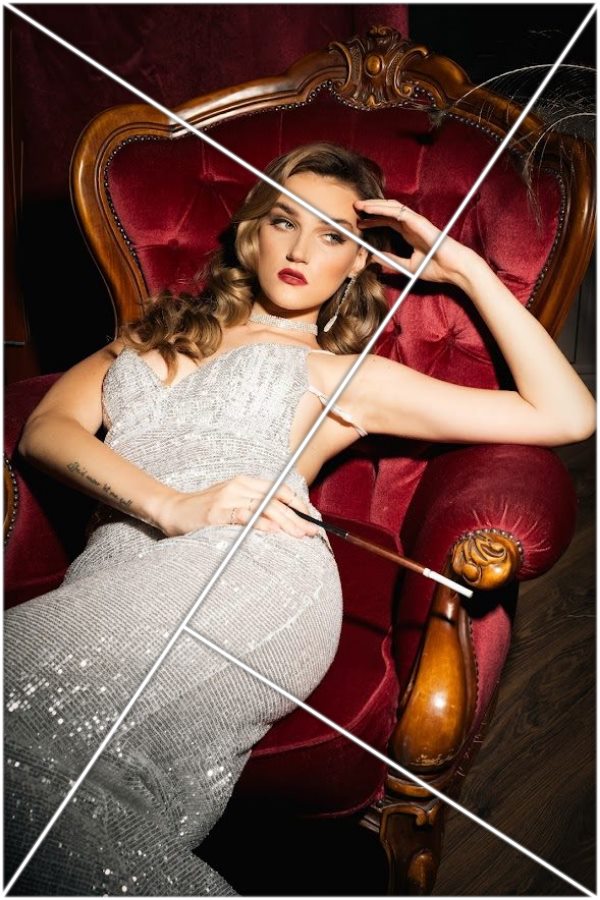
Diagonals and triangles
What it is. Lines from corner to corner, plus perpendiculars to them. You build the composition so the main elements fit into triangles, and the diagonals lead the viewer’s eye where you want it to go.
When to use it. Motion, stairs, a road, hands in the frame, a table with objects laid out, documentary shots and any scene where you want energy. Without diagonal directions an image goes static, and even an untrained eye can see it.
What changes. The frame stops being silent and starts leading the viewer. The more triangles you build into the frame, the stronger the composition looks, and the more confidently the photo reads at first glance.
 Yana Hrytsenko
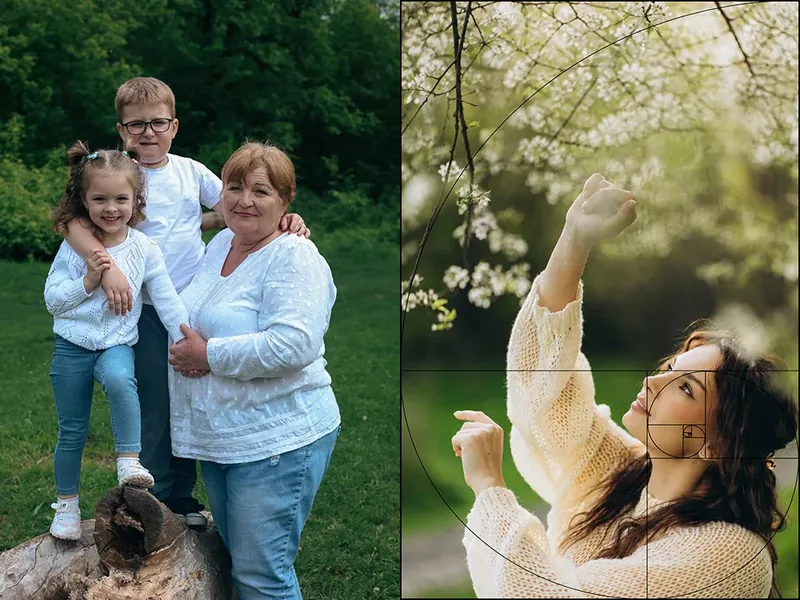
Fibonacci spiral
What it is. The spiral is built on a sequence where the sum of two neighboring numbers gives the next one: 1, 1, 2, 3, 5, 8, 13, 21 and so on. Divide the larger number of a pair by the smaller, and the result approaches 1.618, the same golden ratio. Sunflower seeds grow and seashells curl by this principle, so the eye reads a line like this as natural.
When to use it. Scenes with a natural curl: hair, a branch, fabric, an outstretched arm, sauce on a plate, a layout of ingredients. You can flip and mirror the spiral. It works in any of its four positions.
What changes. The line enters the frame at the wide end and draws the eye to the narrow end, where the main subject sits. The main elements of the composition fall on the first turns of the spiral, the secondary ones come next, and the widest part goes to the background.
 Yaroslava Vorona
A free fifteen-minute masterclass: I break down the golden ratio, diagonals and the spiral on real photos and show exactly what changes in the frame. It comes with a trainer that overlays these grids right on your phone camera: turn it on and shoot along the lines.
Watch the masterclassGolden ratio vs. rule of thirds: the difference in practice
Both rules say the same thing: don’t put the main subject dead center. The whole difference is how far from the center your subject ends up, and that’s where the practical point is.
| Grid | Where the lines run | What it gives the frame |
|---|---|---|
| Rule of thirds | 33% in from each edge | a bigger shift, more breathing room, noticeable energy |
| Golden ratio | 37.5% in from each edge | a tighter frame, calmer balance |
| Fibonacci spiral | a line from the wide end to the narrow end | leads the eye through the frame to the main subject |
On a phone screen, the difference between thirds and the golden ratio is a few percent of the width. It seems like a detail until you put two shots of the same scene side by side. Thirds give more breathing room around the subject and work better in landscapes, on walk-around shoots and in shots with motion. The golden ratio pulls the composition closer to the center and wins in food, product shots and close-up portraits.
A ten-minute exercise

This exercise costs you ten minutes and gives you more than an hour of reading about composition. Do it with your phone, in daylight from a window, with the overhead lights off.
If you haven’t done it yet in the section above, do it now. Everything else happens inside the camera. We won’t need an editor.
A cup, an apple, a vase or a book, anything with a simple shape. A calm background is best: a wall, a table, a board, a plain tablecloth.
Put the object right in the middle of the screen and shoot. This is your baseline, and it’s how most people shoot out of habit.
Don’t move the object, only the phone. The key part of the object, the handle of the cup or the edge of the apple, should land on one of the four grid points.
Open both shots side by side and see in which one your eye travels calmly to the object. The difference is obvious right away, and after that you won’t want to go back to the center.
Once the two shots are done, take a third to really get it. Place the object on an intersection point the same way, but add a diagonal to the frame: the edge of the table, a fold of fabric, a shadow from the window or a long spoon. The third shot is usually the one you’ll want to keep.
Here’s how this exercise looks in photos by my student Iryna Pugach. Iryna lives between Kyiv and Irpin, has a law degree and is a mom of two. The first photo in the row is shot the way most people shoot: the subject dead center, identical tree trunks on both sides, and nowhere for the eye to go. In the next photos the main thing has changed: where Iryna places the person and where the lines lead. Today she shoots portraits for 3,000 UAH an hour and says she “started seeing and thinking more broadly. I analyze every location, interior and model and see right away where and which shot will turn out well.”
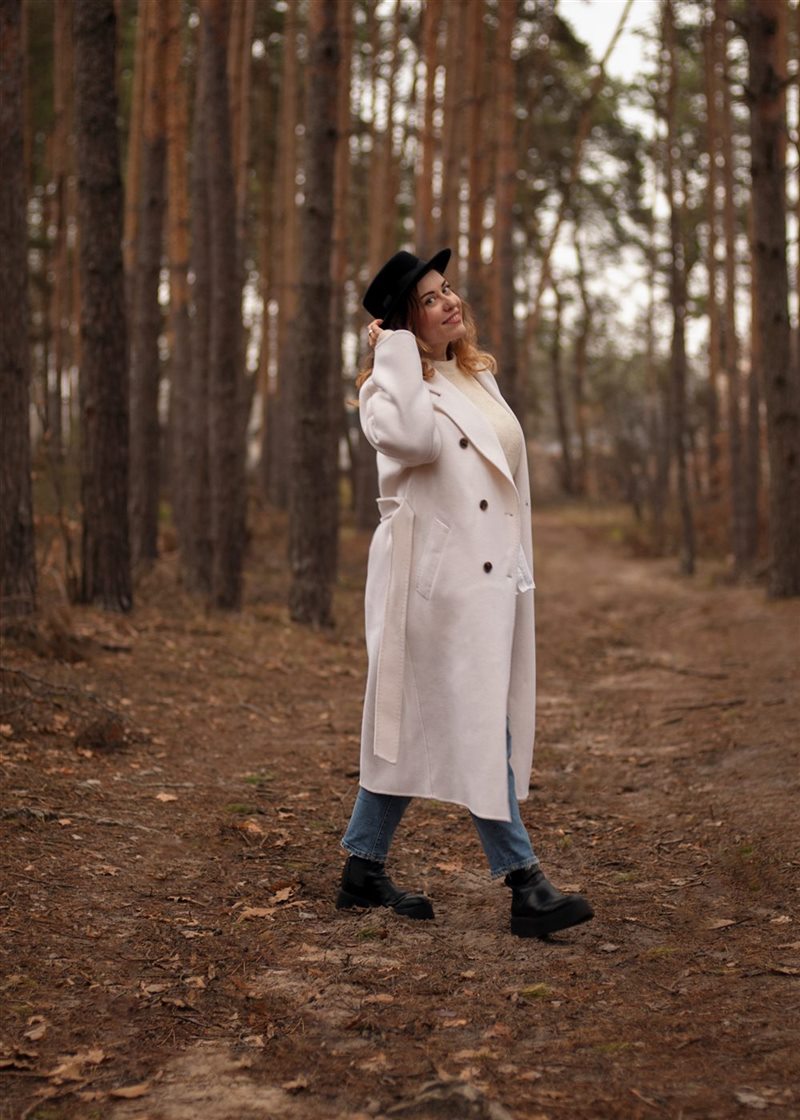 Iryna Pugach
 Iryna Pugach
 Iryna Pugach
 Iryna Pugach
When it’s better to break the rule of thirds
The rule of thirds is a guideline that helps in most scenes, but it’s not a law of physics. There are situations where the center works better, and it’s worth knowing them ahead of time.
A reflection in water, a building facade, a tunnel, an arch, a plate shot from above. A symmetrical scene holds together through balance, and shifting it to one side only destroys that balance.
When the face fills almost the whole frame, the subject physically has nowhere to shift. Here you put the eyes on a grid line, not the face itself.
One small subject in a big empty space lives by its own rules. Keep it closer to the edge than thirds call for, and the shot gets stronger.
Rows of windows, stacks of plates, identical objects in a line. Here the repeating motif does the work, and you need the grid only to keep the row from tilting.
Mistakes that keep composition from showing up
This is the most common thing I see in assignments, and the quickest to fix. One deliberate shift of the subject changes a photo more than a new camera does.
Lines on a screen do nothing by themselves. Before every shot, give yourself one second to ask where the main subject is landing right now.
The person is looking right, the empty space is on the left, and the photo reads as a mistake. Space goes in the direction of the gaze or the movement.
That’s what the horizontal grid line is for: to rest the water, the table or the roofline on it. Fixing the tilt in an editor means losing the edges of the frame.
Cropping removes what’s extra, but you can’t add breathing room you didn’t capture. Composition is decided on the spot, a second before you press the button.
What to do today
Turn on the grid in your phone camera right now. It takes less than a minute. Then shoot a cup twice, centered and on an intersection point, and look at both shots side by side. This exercise gives you a first result the same day, and it’s where working on composition begins.
Composition doesn’t depend on talent or on the price of your camera. It’s made of simple rules that you first hold in your head on purpose, and after a few hundred shots apply automatically. If you’re just getting into photography, the next step is a plan for your first months, and I put it together in the article on how to become a photographer from scratch.
Fifteen minutes of video where I break down three grids on real photos, plus a trainer that overlays those lines right on your phone camera. Turn on the grid you need, point the camera and shoot along the lines, and you’ll see the difference in your very first series.
Watch the masterclassFree. You can watch and practice right on your phone.